Official Luthiers Forum!

Owned and operated by Lance Kragenbrink
It is currently Sun Aug 17, 2025 10:11 am


All times are UTC - 5 hours


Forum rules


Be nice, no cussin and enjoy!


Post new topic Reply to topic  [ 28 posts ]  Go to page 1, 2  Next
Author Message
 Post subject: Jointing Panels...
PostPosted: Wed Jul 23, 2014 11:31 pm 
Offline
Brazilian Rosewood
Brazilian Rosewood

Joined: Wed Feb 20, 2008 7:15 pm
Posts: 7555
First name: Ed
Last Name: Bond
City: Nanaimo
Country: Canada
Focus: Build
Status: Professional
Is driving me insane!

Commence wailing and gnashing of the teeth... gaah


Top
 Profile  
 
 Post subject: Re: Jointing Panels...
PostPosted: Wed Jul 23, 2014 11:47 pm 
Offline
Koa
Koa

Joined: Tue Jan 18, 2005 11:36 am
Posts: 1595
State: ON
Country: Canada
Status: Professional
I'm not sure what method you are using, but it shouldn't be causing you this much grief.

I use a hand plan (Fairly cheep #7 Stanley with an upgraded blade from LeeValley). I don't have any fancy shooting boards, I simply tape the 2 plates together with painters and clamp them to the edge of the bench (with something underneath to raise it up off the bench a bit). With the plane on its side I set it to take a fine cut. If I know there are high or low spots that need to be eliminated I start there. I have usually trued up the plates on my saw so that there shouldn't been any significant high/low spots. A couple partial passes working these high or low spots out is all it should take. I readjust my depth of cut to take a supper fine cut, so you can almost see through the shavings coming off the plane. A razor sharp blade is necessary. I will usually do 1-2 passes where I start 1-2" in from the ends of the plate and stop 1-2" short of the other end. Follow that up with 2-3 full length passes. I then candle the joint to see how I did. If necessary I repeat the process. If I don't see any light in the joint when holding the plates together with light pressure than I consider the joint ready to glue. I've done it enough that I usually get it first or second try and it doesn't take more than a couple minutes. I join my plates using the tent method.

I know when I started out I would spend a long time trying to get a good joint. It eventually got easier. Some people like to use a power jointer, but unless your jointer is setup very well, and with sharp clean blades I think you are further ahead to do it by hand. With practice and good technique a hand planed joint can be achieved very quickly and cleanly.

I have to join some plates soon. Maybe I'll shoot a quick video of my process and post it here.

_________________
Josh House

Canadian Luthier Supply
http://www.canadianluthiersupply.com
https://www.facebook.com/canadianluthiersupply?ref=hl
House Guitars - Custom Built Acoustic Instruments.
http://www.houseguitars.com


These users thanked the author Josh H for the post (total 2): MikeWaz (Sat Aug 20, 2016 3:41 pm) • Beth Mayer (Fri Jul 25, 2014 7:30 pm)
Top
 Profile  
 
 Post subject: Re: Jointing Panels...
PostPosted: Wed Jul 23, 2014 11:55 pm 
Offline
Contributing Member
Contributing Member
User avatar

Joined: Fri Jan 22, 2010 9:59 pm
Posts: 3625
First name: Dennis
Last Name: Kincheloe
City: Kansas City
State: MO
Country: USA
Focus: Build
Status: Amateur
It's all in the preparation of the plane. Reasonably long, absolutely flat, fine mouth opening, fine shaving, ultra-sharp, chipbreaker a hair's width from the edge of the blade. 45 degree cutting angle on mine, but I'm not sure how critical that is.

The chipbreaker even allows cutting against the grain, on plates where the grain is curved so half the edge has runout one way and half the other.

My main problems early on were due to non-flat planes and inadequate sharpening tools.


Top
 Profile  
 
 Post subject: Re: Jointing Panels...
PostPosted: Thu Jul 24, 2014 12:17 am 
Offline
Brazilian Rosewood
Brazilian Rosewood

Joined: Wed Feb 20, 2008 7:15 pm
Posts: 7555
First name: Ed
Last Name: Bond
City: Nanaimo
Country: Canada
Focus: Build
Status: Professional
It's dragging me down right now for sure. After three tries, we finally got a jointer that had level beds. Took it home, took it outta the box, turned it on, and BAM, perfect joints in two passes, just like I was used to at the factory.

Then today, no such luck. No adjustment in the jointer at all, but no way did it shoot a board. So back to the #7 Stanley, but no joy there either. I was actually getting a joint that touched for 3-4", gapped for 6", touched for 8 or so, gapped 3-4", then touched for the last bit. How is that even physically possible with a #7? Something to do with the wood grain I'm sure. It's just one back, but the grain isn't straight but has curvature to it. Tried my LA lee Vally plane too. This is almost giving me a seizure.

It just confounds me how a machine built to do one job, does it dozens of times in a row, then suddenly won't...

It's almost enough to just start buying serviced wood from LMII...

Right, enough whinging, tomorrow is a new day!


Top
 Profile  
 
 Post subject: Re: Jointing Panels...
PostPosted: Thu Jul 24, 2014 1:47 am 
Offline
Contributing Member
Contributing Member
User avatar

Joined: Fri Jan 22, 2010 9:59 pm
Posts: 3625
First name: Dennis
Last Name: Kincheloe
City: Kansas City
State: MO
Country: USA
Focus: Build
Status: Amateur
What kind of wood?

Sounds like sharpness to me. Blade getting a bite in some places, and slipping over others.

One thing I've contemplated is making a jointer plane that uses a scraper blade, since those can usually get a bite on anything and take ultra-fine shavings. They also work better the harder the wood is, which is the opposite of a normal blade, so it gives more options for the most stubborn woods (such as African blackwood).

There's also abrasive jointing, but I've never had much luck with that.

And if you really can't get it, just get it pretty close and inlay a solid wood backstrip. Combined with the internal cross-grain reinforcement, the original edge joint is fully enclosed and held together, so it's unlikely to come apart even with imperfect joinery.


Top
 Profile  
 
 Post subject: Re: Jointing Panels...
PostPosted: Thu Jul 24, 2014 1:58 am 
Offline
Contributing Member
Contributing Member
User avatar

Joined: Fri Jul 10, 2009 4:44 am
Posts: 5587
First name: colin
Last Name: north
Country: Scotland.
Focus: Build
Status: Semi-pro
gaah
Better luck tomorrow!

_________________
The name catgut is confusing. There are two explanations for the mix up.

Catgut is an abbreviation of the word cattle gut. Gut strings are made from sheep or goat intestines, in the past even from horse, mule or donkey intestines.

Otherwise it could be from the word kitgut or kitstring. Kit meant fiddle, not kitten.


Top
 Profile  
 
 Post subject: Re: Jointing Panels...
PostPosted: Thu Jul 24, 2014 3:44 am 
Offline
Contributing Member
Contributing Member

Joined: Sun Jan 27, 2008 4:10 pm
Posts: 2764
First name: Tom
Last Name: West
State: Nova Scotia
Country: Canada
Focus: Build
Status: Amateur
Ed: Hand plane...............! You can't be turning out so many guitars that you have to use a jointer. Save yourself the agony.
Tom

_________________
A person who has never made a mistake has never made anything!!!


Top
 Profile  
 
 Post subject: Re: Jointing Panels...
PostPosted: Thu Jul 24, 2014 7:49 am 
Offline
Walnut
Walnut

Joined: Sun Jun 09, 2013 11:06 pm
Posts: 21
First name: Jeff
Last Name: Crisp
State: Victoria
Country: Australia
Focus: Build
I've found having a light box has help me speed up the process and increased my level of confidence. No more struggling to keep the plates together while holding them up to a light source, all the while worrying that l might be forcing them together more than l should be. I know that's not really a problem for most people who have done hundreds but as yet l haven't and I want to know its perfect now and not discover it wasn't down the road.


Top
 Profile  
 
 Post subject: Re: Jointing Panels...
PostPosted: Thu Jul 24, 2014 11:07 am 
Offline
Brazilian Rosewood
Brazilian Rosewood

Joined: Wed Feb 20, 2008 7:15 pm
Posts: 7555
First name: Ed
Last Name: Bond
City: Nanaimo
Country: Canada
Focus: Build
Status: Professional
Tried the hand planes. Think I'll drop some sandpaper on the jointer bed at this point. I'll take a mediocre joint that needs a center strip even.Image
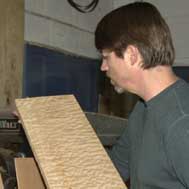
totally standard normal ye olde EIR back, except with curved grain which I think is making mischief with me.

Image

And the LV plane, the Stanley, and the SS jointer, none of whom are being my friends.


Top
 Profile  
 
 Post subject: Re: Jointing Panels...
PostPosted: Thu Jul 24, 2014 11:45 am 
Offline
Brazilian Rosewood
Brazilian Rosewood

Joined: Fri Aug 19, 2005 4:02 am
Posts: 3272
Location: The Woodlands, Texas
First name: Barry
Last Name: Daniels
The corrugated bottom of the #7 Stanley may be the source of your problem. Thin stock may not sit flat against the corrugations. Better to have a non-corrugated plane.


Top
 Profile  
 
 Post subject: Re: Jointing Panels...
PostPosted: Thu Jul 24, 2014 12:45 pm 
Offline
Cocobolo
Cocobolo

Joined: Fri Mar 15, 2013 5:31 am
Posts: 222
First name: Bob
Last Name: Orr
Focus: Build
Status: Amateur
I use a Veritas low angle smoothing plane with a newly sharpened blade set very fine. Plates clamped and set up as above. Read in a British woodworking mag recently about planing things flat and picked up a good hint. It says to get a truly flat surface you have to start off with a slightly concave one, keep with me I know this sounds weird! Thought I would try it on some black walnut I had for an OM. You use stopped shavings along the length, that is you start and stop the shaving about 3 inches from the end of the plates you are planing to create a very slight hollow, take two or three shavings like this. Then slowly take a couple of full length shavings and you should have a perfect joint. When I tried this for the first time I had perfectly jointed plates with no candling whatsoever and the whole process took less than five minutes.

Cheers, Bob


Top
 Profile  
 
 Post subject: Re: Jointing Panels...
PostPosted: Thu Jul 24, 2014 1:29 pm 
Offline
Brazilian Rosewood
Brazilian Rosewood

Joined: Wed Feb 20, 2008 7:15 pm
Posts: 7555
First name: Ed
Last Name: Bond
City: Nanaimo
Country: Canada
Focus: Build
Status: Professional
Oh how I would love to blame the plane. Or the wood. Or the shooting board.

But I have used them on other panels just fine. So I know it's me, somehow...


Top
 Profile  
 
 Post subject: Re: Jointing Panels...
PostPosted: Thu Jul 24, 2014 1:41 pm 
Offline
Contributing Member
Contributing Member
User avatar

Joined: Fri Jul 10, 2009 4:44 am
Posts: 5587
First name: colin
Last Name: north
Country: Scotland.
Focus: Build
Status: Semi-pro
Hmmm...
I've got a set just like that, maybe even a little bit more curve to it.

_________________
The name catgut is confusing. There are two explanations for the mix up.

Catgut is an abbreviation of the word cattle gut. Gut strings are made from sheep or goat intestines, in the past even from horse, mule or donkey intestines.

Otherwise it could be from the word kitgut or kitstring. Kit meant fiddle, not kitten.


Top
 Profile  
 
 Post subject: Re: Jointing Panels...
PostPosted: Thu Jul 24, 2014 1:43 pm 
Offline
Brazilian Rosewood
Brazilian Rosewood

Joined: Wed Feb 20, 2008 7:15 pm
Posts: 7555
First name: Ed
Last Name: Bond
City: Nanaimo
Country: Canada
Focus: Build
Status: Professional
Ok, whatever gets the pig in the oven I guess...Image

In one easy minute...


Top
 Profile  
 
 Post subject: Re: Jointing Panels...
PostPosted: Thu Jul 24, 2014 1:47 pm 
Offline
Brazilian Rosewood
Brazilian Rosewood

Joined: Wed Feb 20, 2008 7:15 pm
Posts: 7555
First name: Ed
Last Name: Bond
City: Nanaimo
Country: Canada
Focus: Build
Status: Professional
Tsk tsk. Temper Mr. Bond...Image
Lol. At least the second set can be joined, though by now it's too small for the MJ is was destined for....


Top
 Profile  
 
 Post subject: Re: Jointing Panels...
PostPosted: Thu Jul 24, 2014 2:00 pm 
Offline
Contributing Member
Contributing Member

Joined: Sun Feb 17, 2013 4:58 pm
Posts: 1449
First name: Ed
Last Name: Minch
City: Chestertown
State: MD
Zip/Postal Code: 21620
Country: United States
Focus: Build
Status: Amateur
Bob

That's an interesting phenomenon. The hand plane is not at all like a power planer - the electric tool has 2 beds that stay parallel (hopefully) as you raise and lower one, so the workpiece travels smoothly from the infeed to the outfeed tables and remains parallel to the bed.

Think about the toe of the handplane laying flat on the piece as you start the cut. Start pushing the plane and the blade then removes a little bit of wood and this causes the back end of the plane to be lowered (we are talking tiny amounts here) to a new level lower than where the toe is so the plane is now tipped up a tiny bit - the tool and the workpiece are no longer parallel. Until the bed of the plane is totally on the workpiece there is a slight thinning of the cut. Once the end of the bed is on the piece of wood, the angle of the raised toe stays the same and the cut continues flat. Then at the end, your tendency is to push on the toe which causes a little bit of of over cutting at the very end. The result is a very slight hump in the center of the board. The numbers are very small, but so is a photon.

This supports the notion of scooping out a tiny amount of material in the center before a final pass or two.

My belief is that when craftsmen made their living with a plane, it didn't much matter if the bed was absolutely flat because they learned how to compensate during the length of the cut to make it flat - that's why we rarely find flat plane soles on well used older planes - it didn't much matter.

But we mere mortals don't use our hand tools enough to be that proficient, so every ounce of advantage we can muster is helpful. I use a 12" long plane - a 5-1/4 in the Stanley system which is 12" long and has only a 1-5/8" blade, same as their #3. I like this size for almost everything guitar related because it has enough length and is lightweight.

Food for thought - did I get it right?

Ed


Top
 Profile  
 
 Post subject: Re: Jointing Panels...
PostPosted: Thu Jul 24, 2014 2:07 pm 
Offline
Contributing Member
Contributing Member
User avatar

Joined: Wed Oct 08, 2008 11:36 am
Posts: 7475
Location: Southeast US
City: Lenoir City
State: TN
Zip/Postal Code: 37772
Country: US
Focus: Repair
One of the things I learned when jointing panels with a plane is that there is a varying amount of hand pressure required between the ends and the middle. If the middle is too concave then ease up on the pressure in the middle and so on. Takes a bit of practice - took me working a jumbo top to a parlor size before I figured it out but worth the learning. Good luck.

_________________
Steve Smith
"Music is what feelings sound like"


Top
 Profile  
 
 Post subject: Re: Jointing Panels...
PostPosted: Thu Jul 24, 2014 2:15 pm 
Offline
Contributing Member
Contributing Member

Joined: Tue Mar 11, 2008 12:28 pm
Posts: 383
First name: William
Last Name: Snyder
City: Brooklyn
State: NY
Country: United States
Focus: Build
Status: Amateur
banker wrote:
I use a Veritas low angle smoothing plane with a newly sharpened blade set very fine. Plates clamped and set up as above. Read in a British woodworking mag recently about planing things flat and picked up a good hint. It says to get a truly flat surface you have to start off with a slightly concave one, keep with me I know this sounds weird! Thought I would try it on some black walnut I had for an OM. You use stopped shavings along the length, that is you start and stop the shaving about 3 inches from the end of the plates you are planing to create a very slight hollow, take two or three shavings like this. Then slowly take a couple of full length shavings and you should have a perfect joint. When I tried this for the first time I had perfectly jointed plates with no candling whatsoever and the whole process took less than five minutes.

Cheers, Bob


Yep, I get things pretty straight around where I want to join (usually trim on the table saw), then take things to my shooting board, set the (sharp) plane relatively fine (sometimes use my 5, sometimes the 4-both work great) and plane the slightest concave into the surfaces to be jointed. I then set the plane about as fine as I can get it and hit it again. I make sure to use good technique, shifting pressure from the nose at the start to more/less neutral in the middle of the pass, to the heel at the end of the pass. It takes a little practice to get the feel...but not that much, really.
The fine-set plane will start removing material only at the ends. I stop when I get my first nice full length shavings. It's usually right the first time. If not it's right the second time. Rarely takes more than 5 minutes.


Top
 Profile  
 
 Post subject: Re: Jointing Panels...
PostPosted: Thu Jul 24, 2014 2:36 pm 
Offline
Brazilian Rosewood
Brazilian Rosewood

Joined: Wed Feb 20, 2008 7:15 pm
Posts: 7555
First name: Ed
Last Name: Bond
City: Nanaimo
Country: Canada
Focus: Build
Status: Professional
I think that there is a strong probability that my planes aren't set up quite as well as I would like to think they are. They are certainly sharp, but especially with the Stanley I think the blade may be just a hair skewed. I think this actually turns the slope on the shooting board into a liability instead of an asset.

Ed, what you wrote makes a lot of sense.


Top
 Profile  
 
 Post subject: Re: Jointing Panels...
PostPosted: Thu Jul 24, 2014 4:21 pm 
Offline
Koa
Koa

Joined: Tue Jan 18, 2005 11:36 am
Posts: 1595
State: ON
Country: Canada
Status: Professional
banker wrote:
I use a Veritas low angle smoothing plane with a newly sharpened blade set very fine. Plates clamped and set up as above. Read in a British woodworking mag recently about planing things flat and picked up a good hint. It says to get a truly flat surface you have to start off with a slightly concave one, keep with me I know this sounds weird! Thought I would try it on some black walnut I had for an OM. You use stopped shavings along the length, that is you start and stop the shaving about 3 inches from the end of the plates you are planing to create a very slight hollow, take two or three shavings like this. Then slowly take a couple of full length shavings and you should have a perfect joint. When I tried this for the first time I had perfectly jointed plates with no candling whatsoever and the whole process took less than five minutes.

Cheers, Bob


This is what I was attempting to describe and is how I learned to join plates from Sergei de Jonge. It does work. Once I have it slightly concave all it takes is 2-3 full length passes to finish the joint. What has been said about hand pressure is also true. There is a "feel" to this process, and I can usually tell before candleing the joint if I've got it or not.

If I were you I would try the hand plane without the sloped board. I know the reasoning behind a sloped board and it makes sense, but I've always used my flat bench top as a surface and it works great. If you're blade is skewed and you are using the sloped surface than you will have trouble.

_________________
Josh House

Canadian Luthier Supply
http://www.canadianluthiersupply.com
https://www.facebook.com/canadianluthiersupply?ref=hl
House Guitars - Custom Built Acoustic Instruments.
http://www.houseguitars.com


Top
 Profile  
 
 Post subject: Re: Jointing Panels...
PostPosted: Thu Jul 24, 2014 5:00 pm 
Offline
Brazilian Rosewood
Brazilian Rosewood

Joined: Wed Feb 20, 2008 7:15 pm
Posts: 7555
First name: Ed
Last Name: Bond
City: Nanaimo
Country: Canada
Focus: Build
Status: Professional
Exactly,

Though I would rather be doing it on the jointer. For a good little run it was fine, two quick passes and glue, just how I want it to be. And how I think it should be. The planes are the back up plan...


Top
 Profile  
 
 Post subject: Re: Jointing Panels...
PostPosted: Thu Jul 24, 2014 9:16 pm 
Offline
Contributing Member
Contributing Member
User avatar

Joined: Tue Aug 17, 2010 3:31 pm
Posts: 1682
First name: Kevin
Last Name: Looker
City: Worthington
State: OH
Zip/Postal Code: 43085
Country: USA
Focus: Build
Status: Amateur
I've fought with joining panels - shooting board, hand planes and jointer.

I now trust my jointer but I've resorted to setting it up, & checking it before use with a dial indicator.
Attachment:
SetupGauge.jpg


Don't ask me to explain it, maybe friction that is eventually overcome, but my jointer will drift out of adjustment by a couple thousandths while just sitting unused in my garage and that's all that it takes to not get a good joint.

Kevin Looker


You do not have the required permissions to view the files attached to this post.

_________________
I'm not a luthier.
I'm just a guy who builds guitars in his basement.
It's better than playing golf.


Top
 Profile  
 
 Post subject: Re: Jointing Panels...
PostPosted: Fri Jul 25, 2014 7:10 am 
Offline
Koa
Koa
User avatar

Joined: Mon Sep 05, 2011 10:45 pm
Posts: 1484
First name: Trevor
Last Name: Gore
City: Sydney
Country: Australia
Focus: Build
Status: Professional
I always use hand planes and a long shooting board for jointing; pic in the book. The pic shows me using a Clifton #7, which I no longer use as a jointer. I've flattened that plane three times and it won't stay flat. It keeps on creeping concave, and when it (or any other plane for that matter) has gone concave on you, you can forget about using it as a jointer. So just because you flattened the sole of a plane once, doesn't necessarily mean it stayed flat. Most of the Stanley/Bailey pattern planes have a chronic tendency to go concave and never seem to stop moving.

What I use now is a LV low angle jack. The sole was flat from new and has stayed flat. What I've found with EIR backs with grain as in your picture is that the depth of cut (even if the sole of the plane is flat) depends on the grain orientation. With that curved grain, partly you're planing with the grain, partly against. I've found that using an iron with a high bevel angle (I use 50 degrees, which, with the 12 degree bed angle, gives a 62 degree cutting angle) and a light cut helps to keep the cut even. Typically, I'll use whatever plane there is to hand to straighten up the edges/match grain with heavy cuts, then switch to the LV with a very sharp blade, very light cuts to shoot the joint. Less than a dozen strokes and less than a minute usually does it for me.

_________________
Trevor Gore, Luthier. Australian hand made acoustic guitars, classical guitars; custom guitar design and build; guitar design instruction.

http://www.goreguitars.com.au


These users thanked the author Trevor Gore for the post: Beth Mayer (Fri Jul 25, 2014 7:39 pm)
Top
 Profile  
 
 Post subject: Re: Jointing Panels...
PostPosted: Fri Jul 25, 2014 8:14 am 
Offline
Brazilian Rosewood
Brazilian Rosewood

Joined: Tue May 13, 2008 10:44 am
Posts: 6262
Location: Virginia
banker wrote:
I use a Veritas low angle smoothing plane with a newly sharpened blade set very fine. Plates clamped and set up as above. Read in a British woodworking mag recently about planing things flat and picked up a good hint. It says to get a truly flat surface you have to start off with a slightly concave one, keep with me I know this sounds weird! Thought I would try it on some black walnut I had for an OM. You use stopped shavings along the length, that is you start and stop the shaving about 3 inches from the end of the plates you are planing to create a very slight hollow, take two or three shavings like this. Then slowly take a couple of full length shavings and you should have a perfect joint. When I tried this for the first time I had perfectly jointed plates with no candling whatsoever and the whole process took less than five minutes.

Cheers, Bob

That's the way I do it. I discovered this myself after trial and error too. Interesting to see that this is actually a 'technique.' I also make sure to candle the joint after a few strokes and I make a mental note of what areas need less pressure and what areas need more. It takes me no more then ten minutes now but I've definitely been through what the OP is frustrated with when I first started.


Top
 Profile  
 
 Post subject: Re: Jointing Panels...
PostPosted: Fri Jul 25, 2014 1:30 pm 
Offline
Brazilian Rosewood
Brazilian Rosewood

Joined: Wed Feb 20, 2008 7:15 pm
Posts: 7555
First name: Ed
Last Name: Bond
City: Nanaimo
Country: Canada
Focus: Build
Status: Professional
I think the grain was a contributing factor. When I put paper on the jointer bed it came together real fast. Feels like cheating, otoh...who cares?


Top
 Profile  
 
Display posts from previous:  Sort by  
Post new topic Reply to topic  [ 28 posts ]  Go to page 1, 2  Next

All times are UTC - 5 hours


Who is online

Users browsing this forum: No registered users and 18 guests


You cannot post new topics in this forum
You cannot reply to topics in this forum
You cannot edit your posts in this forum
You cannot delete your posts in this forum
You cannot post attachments in this forum

Jump to:  
Powered by phpBB® Forum Software © phpBB Group
phpBB customization services by 2by2host.com